
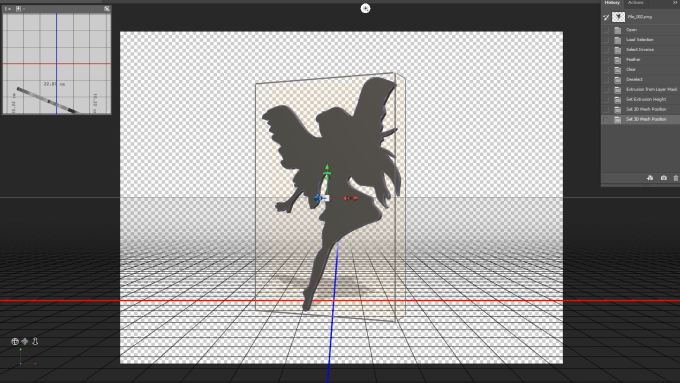
In a way, this project is like reverse engineering what the Grade 3s did with Minecraft. With Minecraft, of course, 99% of the time, you are placing blocks to create something. With 3D Slash, as… More

Teaching Media Arts in Primary School
In a way, this project is like reverse engineering what the Grade 3s did with Minecraft. With Minecraft, of course, 99% of the time, you are placing blocks to create something. With 3D Slash, as… More
For the Grade 1s and 2s, my entry level lesson into the world of 3D was creating pendants that you wear around your neck. We start of by having a basic discussion to flesh out… More

Firstly, I want to apologise for being off the grid for so long. Personal stuff got in the way, as it always does, and passion projects like this one had to be put on hold… More
Just a quick note to say that the ebook of this site – Confessions of a Media Arts Teacher – is on special right now! 20% off for the next two weeks. Now is the time to buy, if you’ve been on the fence about it, and have something fun and exciting to read over the Christmas holidays.
For the next two weeks, until Nov 13th, the Direct Download Paypal button on the main site will charge only $23.95 for the ebook instead of the regular $29.95 price.
So get in now, while you can!
This project takes the idea of redesigning some of the logos of the native Apple apps on an iPad. I explained to the students that I was turning them into mini graphic designer teams. Apple has asked for a fresh look for its own logos.
The project was done in four sessions, even though it was orginally planned for three. Sessions 1 & 2 were the students sketching their logos on the iPad using Adobe Draw. I got them using Adobe Draw rather than Adobe Sketch because I wanted their images to be vectorised pictures which could be scaled up and down without degradation. Also, with Adobe Draw, it’s easy to fill in a closed shape by pressing down inside the shape. These images were saved one at a time into the students Google Drive, ready to be used on a computer.


The next step in the second session was to bring all the images in Illustrator to crop them and resize them all uniformly. I provided them with a template file which contained 20 artboards, all in a grid, for the students to use. They didn’t need to fill in all artboards when exporting out their images.
Once this was done, the fourth and final session was the students placing the images into my iPad mockup InDesign template and labelling them. I even sourced the correct font that Apple uses on it’s iOS devices! Once that was done, their work was saved as a jpg and I cropped the bottom part of since no one got that far.
Below are two videos. The first one explains how I got the students using Illustrator to prepare their images, and the second video details how the students placed the icons into InDesign. At the end, I have some student examples.
The students found this an exciting project to do. It gave them a good appreciation of what it is like to fulfill a brief as a graphic designer. The only real notes I gave them along the way was to make sure it was obvious what app their icon design was for. You don’t want people looking at the icon and having no idea what it’s for – no matter how good it looks.
Here are some examples (apologies for the low res quality).

You’ve followed the blog, now get the book! The time is ready and the time is now. The ultimate guide to teaching Media Arts is ready for purchase and download! This book is packed to the brim with lesson plans, instructional videos, assets to download and reflections along the way. This book will give you plenty of ideas to easily fill a year’s worth of curriculum.
Tried and tested on an iPad and on a Mac. Reading it on a PC has limited functionality. This is a known issue and is currently being worked on, and customers will be advised when we have the fix in place.
Click here to download a sample of the first 10 pages! (ePUB format – chapter links won’t work on the Sample) and click here to download a sample lesson (ePUB format)
The book is selling at a crazy price of $29.95! There are options to deliver the book that you can read in the information below.
Buy “Confessions of a Media Arts Teacher” eBook – Direct Download option

Buy “Confessions of a Media Arts Teacher” eBook – USB Key Delivered option
The book is an expansion of the posts from last year on this blog. A lot of effort has gone into creating content that can be viewed (many, many screencasts; picture galleries) and downloaded (lesson resources, PowerPoints etc) for most lessons covered in this book.
This is a lot more than just a copy of the blog.
A lot of reflection has gone into the writing of this. I’ve added notes here and there with tips on how to better teach the lessons if I feel it didn’t quite go the way I planned.

As you see in the picture above, all lessons come with notes on what grade level I taught the lesson at, what apps were used, and links to where to get those apps. Obviously prices will vary and were current as of the time of writing.
This book is for everyone! Firstly, whether you teach Primary or Secondary, many of these lessons can be adapted for older students. Secondly, as a parent, this is a way that you can get your kids interested in videography, photography and animation (if they aren’t already) by exposing them to some fantastic, creative and fun apps.
If there is enough interest, I already have ideas on a volume 2 which will provide links to the Victorian and Australian Curriculums, as well as detail how in my second year I have progressed from teaching all students from scratch, to now consolidating and developing their skills in Media Arts.
I hope you do choose to purchase this book. As I am a poor teacher, I beg that you don’t share the file with everyone and anyone. I can’t stop you, but obviously I’d like people to purchase the book I’ve put so many months into. Certainly, for a school, $29.95 is a bargain for any fledgling Media Arts teacher who desperately needs ideas for their classes.
The book can be delivered in two ways. If you choose DIRECT DOWNLOAD, I will email you with a link (via Dropbox) for you to download. But – be aware, with all the embedded media in the book – it clocks up at approx 1.6gb. That’s a lot for some people. So I’ve added, for an additional $12, the option for me to post out the book on a USB key anywhere in Australia. Price includes USB key and delivery. Overseas customers can contact me for delivery prices. I don’t intend to profit on this extra option, I just wanted to make the choice available.
Please be aware this is a huge, interactive experience. The book is full of videos, picture galleries and links to downloadable content via Dropbox. As such, not every ebook app plays nicely with such a huge book.
This book is recommended, and is tested primarily on an iPad that has a Dropbox app also installed and signed in. That way, you can access all my downloads directly on the device. If you are on a Mac, then iBooks works just as well. We are currently working on a known issue getting the book to work properly on a PC. Customers will be advised in the future when this fix has been worked out.
Please feel free to comment and give me some feedback on the book. I’d really appreciate it.
Buy “Confessions of a Media Arts Teacher” eBook – Direct Download option
Buy “Confessions of a Media Arts Teacher” eBook – USB Key Delivered option

Something that I bet my Grade 5 students had never thought about before. How do you create a font? The answer to that can be quite complicated and honestly a little dull. But creating their own handwritten font – using a simple app on the iPad? That has potential to be much more interesting.
There are many, many apps to create your own font, and some cost quite a bit of money. The one I chose is free and easy to use. Not just that – it can also be saved out to work on an iOS device or a computer.
The video below shows how to create a font using the app, and below that are a couple of student examples.


Who doesn’t love a comic book? Maybe I should rephrase . . . What kid doesn’t love a comic book? Well, the answer is probably a fair few, so let’s try one more time. What kid doesn’t love creating a comic book? Ah, now the answer is much higher. Probably most kids, I would think. Judging by my students, there was a lot of fun to be had in this project. I also think it’s important to pitch it at the right age. Grade 4 for this project (that’s 9-10 year olds) is the perfect age. They are young enough to love the idea, but literate enough to craft a cohesive story.
So, the project was this. I told the students to go out and think of a photo story. Around 10-12 images photos would be ideal. Think of what the story is, and what photos you need to take to tell the story. That was a whole session in itself.
From there I modeled how to use Halftone (actually Halftone 2 is what we used). We also had a discussion on what elements make up a comic page. This page on Wikipedia was ideal in helping me to prepare for this. I showed how to create pages, find templates for the panels, insert speech bubbles and captions. Most importantly, I showed them the edit tool and what you could do. From there they went about creating their own comic book.
The kids had a great deal of fun with this. The app was a little challenging to them the first time they used it, but once they got into it, they flew through the process.
When saving their work, there is the option to save each page as an image, or the whole thing as a PDF, but it actually works really well as a video!
Here is a video that models the app – and again, apologies for the sound quality. That’s what you get for recording when you’re out of the country!
Here is one particular example I really enjoyed.
For this project, I needed to seriously brush up on my Illustrator skills. I’ll be the first to admit that Illustrator is not my preferred tool for the reason that I CAN’T DRAW. So, I looked for guidance.
I found an excellent series of videos by a YouTuber named Danksy who I relied heavily on to learn how to draw the first three emojis I was going to teach the class. My idea is that I would create an Illustrator file with four empty artboards. Each week, the students would learn how to create one kind of emoji (I had happy, sad and angry) and in the fourth week – now they had some skills and experience under their belts – they would have a go and making their own in the fourth artboard.

To say the students were excited about doing this, is an understatement. They were practically ripping the door down before each class to come in. They absolutely loved it!!! It was, however, a lot of hard work. Each lesson had me give the students a couple of instructions before they ran back to their computers to do them. Many, many times! But there was a lot of energy in what we were doing, and there were some great skills to learn here, like using the pen tool, the arc tool, pathfinder -> divide and cut out, a lot of copying and pasting, nudging both in size and movement, and using exact colours based on hex codes.
I did not make videos in how to do these, since Dansky explains it very well. I made a few small concessions in my teaching, so I didn’t do it absolutely exactly the same, but it was pretty close, so I need to give him complete credit.
As far as the kids went with their own artwork, I was really blown away with what some of them came up with. The only rule I had was that it needed to be a face emoji. I’ve said it before, and I’ll say it again – I teach the skills, but the ideas that come from them is where the real joy of my job lies.
Here are some highlights:


This is my first big regret of the year. Not that the idea behind the project wasn’t a good one, but that the expectation was perhaps too great for my Grade 3 students, who are still very new to Photoshop.
The genesis of this project started with a conversation with the teachers in the Grade 3 team. Something I do regularly is to check in with the teams to see what they are covering in the upcoming term to see if I can those themes to my lessons. In this case, they told me that the students would soon be doing a unit on animal adaptations. They further told me that in the past they have done a fun engagement activity with the kids where they can design their own animal, using different animal bodyparts. I got the impression this was usually done as a sketch. Could this be done in Photoshop they asked?
The answer, of course, is yes – it can. The more important question is, are the students up for it? That, I was not so sure about. It usually takes some practise with a variety of tools (such as the quick selection tool, the magic wand, quick mask, etc) to make a good selection that you can then remove a background.
I planned this lesson to come right after the one they did on selecting and removing the background from superhero pictures (which is covered in a post last year here). In that case, the images were chosen by me, and had varying levels of difficulty in selecting the background correctly.
In this activity, students were to choose three animals. They were to find the pictures on Google and save them to import into Photoshop. But – there were some guidelines first. Each animal needed to be facing the same direction to make it easier. I wanted the students to visualise how they wanted the creature to look in their heads, before they finalised which pictures they were going to use. Most students followed this, but some still had some problematic choices. It says something about the kind of teacher I am, in that there were cases where I let the students choose difficult pictures so they could see where the problems would lie when they brought them into Photoshop.
In any case, the project was simple enough in concept. Bring in three pictures to Photoshop – each on a seperate layer. Choose one animal for the head, one for the body (including legs) and one for the tail. Cut out the background as best you can, and make any transformations needed to put together the animal.
The results were fairly mixed, it’s fair to say. This is perhaps one for a Grade 4 class who have a little more experience in using Photoshop. Nevertheless, the students were all pretty happy with how their menagerie came out.
Below is a video describing the workflow in Photoshop, and under that are some student examples.


A simple app for a simple project. The Grade 2 students were shown how to use an app called Colorscape. Basically, this app takes a photo (either directly from camera or saved on the camera roll) and turns it into a black and white line drawing like a colouring page. Students can then paint in colours however they like. There are a huge range of colours to choose from, including Palette Colours – which are a palette of colours taken directly from the original photo itself.
I got my trusty box of toys out that I normally use for stop motion videos, and had the students use them to photograph and to colour. When they had finished this first task, I then let them take photos of whatever they wanted. I did have a small caveat, and that was that if they were taking a photo of someone else, they needed to ask their permission first. Knowing the kids, they would have some fun with it!
Some students took it a little more seriously than others. The best works were those that were done carefully and patiently, with some thought into what colours they wanted to use.
The students really enjoyed it, and as an aside – my own 5 year old daughter loves using the app too.
Here below is a quick video in how to use the app, and below that some student examples.


I had in my head for a long time an idea to have a project that starts from a photo, worked on with an iPad, and finished off using a desktop computer – and using a variety of Adobe tools to show the power of the Creative Cloud.
The lynchpin to all of this is the app Adobe Capture. This recent app is an amalgamation of various Adobe mobile apps like Adobe Color, Adobe Brush, Adobe Hue and Adobe Shape. Essentially it’s a way to capture a photo and create a shape, a pattern, colours or even a look (essentially a colour graded filter) to apply to other images.
Ok, so here’s what I asked the kids to do. I told them to go out and take two photos. One photo that you will use to create your own custom brush, and one photo to create their own custom pattern. Although I had showed them what a custom brush and pattern looked like before they went out, I saved showing them how to do it on the app until they all came back in. By the end of the first session, they had all saved their brushes in a creative cloud library on the iPad.
The second session was using the app Adobe Sketch and choosing their custom brush from the creative cloud library. Using that brush, they were free to draw whatever picture they wanted. Those pictures were then saved into their creative cloud libraries.
The third session they got on the computers in Photoshop to open up a template I created. The template (see below) basically has a transparent background and a lower third on top with some text to write over with their names. They needed to access the creative cloud library and bring in their sketch and then their pattern and put that as their background. Finally, they needed to put their names on the lower third.

So, you can see, plenty of fun to be had, and lots of creative choices along the way. I should say, there are a couple of issues using creative cloud libraries. Let’s go through them and what I did about them.
1) You need to have an Adobe ID to login to creative cloud, and you need to be 13 years or over to have one.
Ok, so my kids are younger than that. So I do what every other teacher does, and that’s create class accounts. I have 13 iPads and 13 computers. Each computer and iPad (say # 1) are linked to the same account. So you can create an Adobe account like yourschool+1@gmail.com and link the iPad and computer to that. Not 100% kosher, but not illegal by any means. I know plenty of educators that do this for their classes.
2) You need to have a license at your school that supports Creative Cloud libraries.
Check to see what your license includes, because many do not allow connections to the creative cloud.
Having said that, this was a fantastic project and I loved what the kids came up with. Below are three videos (one for each session) that goes into the workflow, and below that are a few examples from the students.
** Apologies for the sound. I wasn’t at my usual recording locations **
15

The mobile apps Adobe Draw and Adobe Sketch are almost identical. Both are drawing programs, both have the same interface and the same layering functionality. The difference mainly lies in what they are meant to be used for. Adobe Draw is supposed to be for creating vector artwork. The kind of artwork that can be scaled up and down without degrading the quality.
Adobe Sketch offers the same kind of tools but with the idea of – as it says – sketching artwork with built in or custom brushes. I touched on Adobe Sketch when the grade 4s did their project using Adobe Capture, Adobe Sketch and Photoshop. In that activity, the students created custom brushes out of photos they took using Adobe Capture.
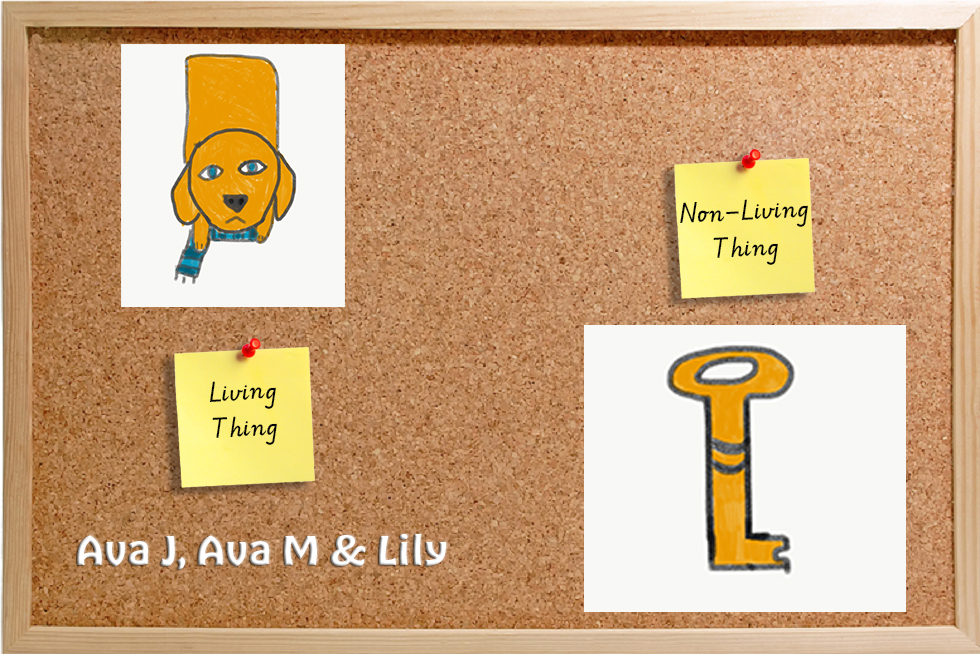
Here I used this app with two year levels. The grade 2s were asked to sketch two objects – a living thing and a non-living thing. This related to their inquiry unit in their classroom. To do this, I allowed them to search for images on Google. What I wanted was for them to try and sketch an object they see in front of them, not one from a picture in their head. I wanted them to pay attention to the little details, and try and get proportions right. Some students chose something challenging like a horse or a tiger, and some went for something quite basic like a tree. I was quite strict with students choosing something “easy”, they had to get all the details right. For instance, when doing the non-living thing, two students wanted to do a soccer ball. The first time they came to me, it was just a circle. I sent them back saying I need to be able to tell it’s a soccer ball, not just a circle.
Really, that line was something I repeated again and again to the students. It doesn’t have to be perfect, but it needs to look something like what you have in front of you to sketch. If I’m confused by what you’ve done, maybe have a go at something easier. Many students reevaluated what they needed to do and looked for other pictures.
Once they were done, I collected the pictures, and made them into posters in Photoshop, labeling living and non-living things. Here are some examples:


With the Grade 6s, we went back to the idea of tracing artwork like I did last year with the Grade 1-2s, but gave these older students a challenge in trying to sketch Manga characters. In this case, I gave them some images in a library to choose from and gave them a couple of sessions to get it done. I chose Manga images because of the difference in style. One way of learning how to draw in this way is to follow and copy an example. The eyes are a big element of the style, as is the exaggerated expressions. I had some boys and girls in my library of examples, as well as a few Manga creatures (yes, I did get Pikachu). This proved to be a very popular lesson and produced some lovely work. Unfortunately, even with a couple of lessons, not everyone got to finish.
Here are some of my favourites:
The process of bringing an image into Adobe Sketch and using it as a background to trace over is practically the same as using Adobe Draw. You can find the post on that process here on my lesson on tracing with Adobe Draw.
