Week 7: Adobe Voice, PhotoshopMix #3 and Composites in Photoshop #2

This week, the Prep class were introduced to a new app for them – Adobe Voice, the Grade 1-2s continue with PhotoshopMix to complete their “Think Board”, and the Grade 3-6s finished their work on their composite project. As usual, I’ll start with the Preps, then on to PhotoshopMix and finally the Photoshop composite project at the end of the post.

ADOBE VOICE

Adobe Voice has been around for a couple of years now, and I absolutely love it. I love it because of how easy it is to use. When I introduced it to the Prep students, I said it was like making a book on the iPad, but instead of words and pictures, we have sound and pictures and each “page” the student needs to record their voice.

I’ve used it in my past life as a generalist classroom teacher to great effect. Its been great as another format to publish or tell a story, and it’s also been especially useful with students with disabilities in telling their story in a way they understand and can handle. In this case, I wanted to present to the younger children a way to “tell” their story without having to write words. Enter – Adobe Voice. This week was really just about getting the kids to play with it. I explained how it worked. I explained how to record lines for each page and how to find (or take) photos.

Next, we will revisit Voice and look at doing projects where they talk about themselves and their families.

PHOTOSHOPMIX THINKBOARDS #2

I was pleasently surprised this week how easily the grade 1/2s coped with what they had to do. Essentially the students were asked to “fill” their thought bubbles with images found in Google. I explained how to go into Safari, find the picture they want and press/hold their finger on the image until the popup comes up asking if they want to save their image. Once they had enough images, they were to go back into their project in PhotoshopMix and create new layers for each picture and pop them in. Once in they could resize and rotate the images to get their best fit.

I was on hand to help spell any words they found tricky (they are 6-7 year olds, after all), but aside from that, they need very little help, and many groups actually got to finish early. One thing I didn’t realise until teaching the first class – PhotoshopMix seems to limit the number of layers you can have in a composite to 5. So the kids could only choose three pictures (since the photo of them and the background image were two images already in.

The grade 1s were asked: What pops in your head when you think of Healthy Choices? The grade 2s were asked: What pops in your head when you think of Communities? Both topics were covered extensively in their classrooms, so they had some ready made ideas. I told the kids that I would print them out for their teachers and they had to explain to their teachers why they chose the images they did.

Here are some examples of grade 1 posters on healthy choices.

This slideshow requires JavaScript.

And here are some examples of grade 2 posters on communities.

This slideshow requires JavaScript.


PHOTOSHOP CC – CREATING COMPOSITES #2

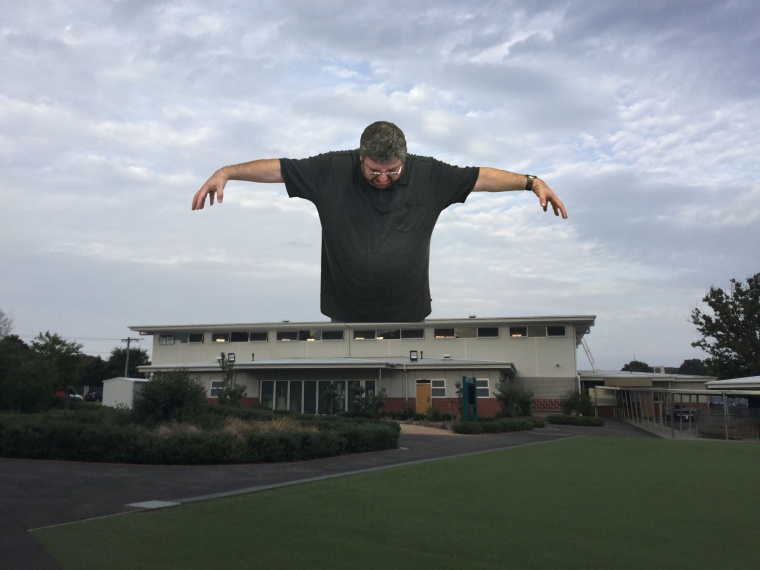
This week the older students finished their work (most of them) on composites. They did a reasonable job selecting the background and deleting it. Today I ran through with them how to copy and paste from one file to another. Then how to use Free Transform to scale, move and rotate it in position. You can see that, for the most part, its almost exactly the same skill set that the grade 1/2s were using this week on the iPads.

The lessons went off without a hitch. The ideas came out, more or less, as planned. There were a few tweaks that I suggested here and there; as well as some students asking how to do various things (such as a colour overlay, transparency, etc.).

The results were inspiring, to be honest. I can teach the skills and how to use the tools. I can go through with them best practise. But the ideas, the creativity – that’s all them.

Here are some of my favourites.

That’s the last week. It was a short term 1, this year. Next term will be 12 weeks (ouch!) but that does suit perfectly the idea I have of stretching out Design. More to be revealed later.

Next week, due to other commitments, I’ll only be teaching grade 3 and grade 5. We’re going to be doing the Photoshop Filter Challenge. Stay tuned for next week!

Week 6: Prep Photography #2, PhotoshopMix #2 and Composites in Photoshop

This week, the Prep class continued using their camera on the iPads by going out on a field trip, the Grade 1-2s PhotoshopMix to begin a “Think Board” that tied in with their inquiry topics, and the Grade 3-6s began work on their composite project. As usual, I’ll start with the Preps, then on to PhotoshopMix and finally the Photoshop composite project at the end of the post.

PREP PHOTOGRAPHY #2

This week continued our look at using the iPad cameras and looking critically at what makes a good photograph.

The lesson was virtually the same as last week – which I have learned is important when you are dealing with very young children. Keep it the same, go over the instruction, and get it stuck in their heads. So, I modelled how to use the camera again, and how to use the Photos app to tag which one was their favourite. In this process, we discussed about choosing one, and only one photo. We discussed what a successful photo looks like.

And then, for a change, I took them out to our Fairy Garden and Junior Playground. I told them they could take any photos they liked, with just one condition: I didn’t want any people in the photo. For this shoot, I only wanted environmental surroundings.

So with that caveat, I let them go. As you would expect, some photos were better than others. I was, though, struck by the kids’ “point of view”. Some asked to climb on the equipment so they could shoot from a high angle. I had no problem with that, but I did insist on looking after their device before they climbed the equipment.

PHOTOSHOPMIX THINKBOARDS #1

Now the grade 1-2s have practised taking out backgrounds of an image in the PhotoshopMix app, it was time this week to put that skill to some use.

I wanted to tie in what the kids were doing in Inquiry to a project they do in Media Arts. Which is very much a PYP* style of doing things. The grade 1s were looking at healthy bodies/healthy minds, and the grade 1s were looking at communities.

So the idea I had was to create a cloud landscape with a thought bubble at the top. Then the kids would put in a photo of themselves on the poster, and get rid of the background. Finally (and this will come next week) the kids will add pictures in the thought bubble relating to their central question of their Inquiry.

So, I already had a template prepared, and I made sure that the image was on the camera roll of every iPad. The kids then needed to import that poster into a new project, bring their project to me, so I could take a photo of them (with “thinking” faces) and then they needed to composite themselves into the poster.

poster

TROUBLESHOOTING CREATIVE CLOUD

Here’s a valuable lesson I got from doing this, and it had nothing to do with the kids being able to do the project (which they could, fairly easily).

All the iPads (12 of them) I have, have the same Apple ID, and therefore can have all the apps synced up together. That works well – it means I only need to get an app once, and it downloads on all the devices. When I set up the PhotoshopMix app on the iPads, I gave them all the same Adobe ID when I signed them all in – which was a BIG mistake. What it means is – and this SHOULD be a good thing – is that a student can save their project on one device, it should sync it across Creative Cloud – and it wouldn’t matter which device they use next week, it would be there, same as on all the other devices.

Sounds great? I mean, I have each student assigned to the same iPad every week any way, but hey – good to know! Except – no. See when the students came up to me with their finished projects and I saved them, it would try and save ON ALL THE DEVICES. So then I would save the next project, often when the other was still going. In other words, it seemed like I was overloading my Creative Cloud account, and it wasn’t handling it properly.

How do I know? Because, if there was a bunch saving at once, and I went and saved a project, it wouldn’t save all the changes when I saw it in the project list. So the students had to go and do all the background erasing again!

I did come up – eventually – with a quick fix to this. When they brought me their project, and it was ready to save, I did a few things to it and then took it back. That meant that the background erasing was not the last thing the project did, and should save that part of it.

What do I mean? Well, ok, a student comes up with their project ready to save. I check it out, see if there are any glaring problems that they need to fix. Let’s say there isn’t. Now, before I press the “back” arrow (which takes me out of the project and into the Project list view – thereby saving it, I duplicate a layer, reorder it and then clear the layer. Then I give it about 8 seconds and then save the project. Almost always, this worked. See, the problem wasn’t that before the project wouldn’t save, it just wouldn’t save the last step of the project, which was the background erasing. For some students, this was fairly easy, for some not so much.

Oh, and an extra point – while I’m waiting to get a green screen set up in the corner of my studio, I had the students pose for their photos by a blank white wall. This made it fairly easy to mask out the background. Although, as you’ll see with the older kids, I probably should have done that with them too.

PHOTOSHOP CC – CREATING COMPOSITES #1

Now the older kids had some practise erasing the background of their images using Photoshop CC, we could start thinking about their own imaginative projects.

I told them that this is where their creativity could really shine. I’ll showed them an example with what I did, but I didn’t want them to copy me. I want them to come up with their own ideas. I didn’t want them to take a camera and go straight out. I wanted them to work with their partner and discuss what their ideas were and work out what photos they would need to take (ie: their background image and their foreground images). Here is the example I gave them of me:

FinalComp

Basic, as you can see, but effective. I modelled how I did this on Photoshop, but I quickly realised two things. It was too much for one class. I needed to get them to plan their idea, take their photos, come back and upload them to the PC through Google Drive, and start working on erasing the background. There was no point going into the copying and pasting from one image to another – not for this week.

The other is, I tried introducing Quick Mask as an alternative way of refining masks. This confused (especially the younger kids) quite a bit. I stopped talking about it with the rest of my classes, but plan to bring it back next week with the older kids as a way to check their work, rather than painting in and out a selection.

The kids did find that it was harder selecting the backgrounds of a photo than of an illustration, as they did last week. I deliberately did NOT tell them to use a plain background, because I wanted them to face the challenge of getting a good selection with busy backgrounds. This proved a little too hard for a lot of them, and I had to help some quite a bit. I don’t mind this, though. Masking and selecting is difficult enough for adults. I wanted them to get the core idea, though. The younger kids at least will have more practise when we revisit it next year.

I look forward to sharing with you what the kids come up with next week. From what I hear, some will be very, very clever.

Week 5: Prep Photography, PhotoshopMix and Selections in Photoshop

This week, the Prep class began experimenting with the camera on the iPads, the Grade 1-2s used the iPad app PhotoshopMix to create simple composites, and the Grade 3-6s continued with Photoshop, learning how to select a background to cut out. I’ll start with the Preps, then on to PhotoshopMix and finally Photoshop proper at the end of the post.

PREP PHOTOGRAPHY #1

This week we started a two lesson unit on using the camera on the iPad app. The students all come with various experience levels of using a camera on a device. Most have done it in some way before, and those who hadn’t, picked it up quite quickly.

We discussed looking for the perfect shot, tapping the shutter button (rather than holding it down in burst mode), checking your photo and coming back into the camera.

I let them around the studio, as well as the library next door, and let them take whatever photos they wanted. An issue I had, was that often the cameras were set to Video or Slow Mo or one of the other settings, and because a lot of them are pre-readers, they couldn’t tell the difference. Although, most of them COULD tell that they were taking video rather than photos, and asked me to fix it for them. But definitely something I had to keep in mind.

From there, I got the kids to come back on the floor. I told them I wanted them to choose, out of all the photos they took, one favourite they wanted to share with the class. I went through how to get on the Photos app, swipe through their photos and add a heart (favourite) to their chosen pic.

I learnt from the first class I needed to be a wee more explicit in my instruction. many students chose their favourite photo, regardless of who took it. I explained that if you took the photo, the photo is yours. I wanted their favourite photo that THEY took.

Once they both had their favourite, they came up to me at my desk. I had the Prep folder open on my desktop, which was mirrored on the TV nice and big for them to see. As each pair handed me their iPad, I quickly selected the photos from the favourite album, uploaded them to Google Drive, in the Prep folder. Within moments they saw their photo up their on the TV. Once I got through everyone’s, I did a little slideshow with some positive commentry about each image.

Next week, we will take a field trip to the junior school play area and look at taking photos of surroundings, rather than people.

PHOTOSHOPMIX

Last year, I started Genius Hour in my class. Genuis Hour is a classroom version of the time Google gives their employees to work on their own passion projects within the working week. Search for Genius Hour on the net, and you’ll get lots of articles from educators who allow their students an hour a day to learn about what they want to learn about. In my class, there were only two conditions. Whatever it was they did, they had to be learning something they didn’t know before, and they had to be “creating” something – not just playing.

Some kids discovered PhotoshopMix which I had put on the iPads. PhotoshopMix is the Adobe mobile app that lets you create composites on the iPad. The idea is very simple. Import photos, select away the background, bring other pictures in on seperate layers, and then blend them together. Here’s a video Adobe put out.

It’s a free app. I didn’t do much in the way of explaining how to use the app, the students discovered this on their own. Below are three of my favourite composites the students came up with.

So, since I’ve been working on Photoshop CC with the Grades 3-6s, I wanted the Grade 1-2s to be able to do the same sort of thing but on the desktop. PhotoshopMix was the obvious choice.

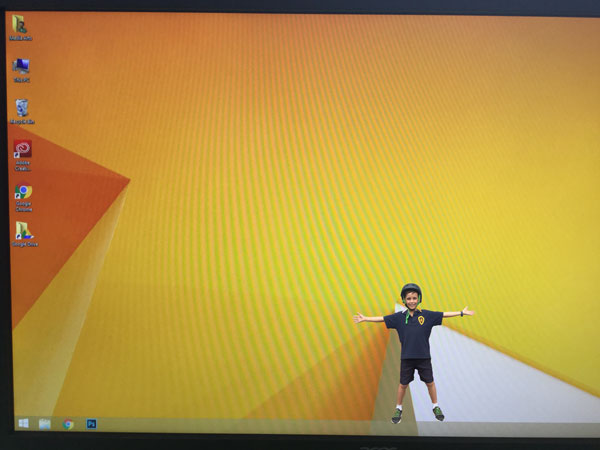
I gave them the example of taking a photo of a computer screen desktop and then taking a photo of a student. I then composited them together. First, you use the “smart brush” to paint in the area you want to keep – ie: the student, then you switch to the “basic brush” and choose to subtract from the selection. Then I modelled how to zoom in and check all the edges. Paint out what you don’t want, switch to the addition selection, paint back in what you do.

comp

You might notice, this is quite similar to what they did last week with the ColorSplash app. The skills they practised doing that served them very well doing this.

Today was really about playing with the app. I have plans for next week where they will start on a composite project that will tie into their Inquiry topics.

PHOTOSHOP CC – MAKING SELECTIONS

This week starts a three week unit on Composites. Composites are basically images blended with other images. Tying in with last week’s lesson on layers in Photoshop, I wanted the grade 3-6s to start getting used to selecting a background, and deleting it in a layer so that the subject is on a transparent background. From there, next week, we will get into students coming up with their own creative ideas and utilising the skills they learn in making their composites.

So, in order to engage them, I presented them with a series of superhero pictures I found. Starting with the Superman one (below), showing the students how to use the Quick Selection brush to paint the background selection, then unlocking the layer, and deleting the background.

superman

I chose this one to start with on purpose because it’s so easy. A flat, white, simple background, contrasting heavily with the subject, means that Photoshop can almost automatically find the background on it’s own.

After I modelled how to use the tool (adding and subtracting a selection, changing the brush size, using Quick Mask) I got them to have a go using it for Superman and once they showed me they could do the simple one, I had a series of other superhero ones for them to work on that were significantly harder (see below).

spiderman

An image like this one of Spiderman, has it’s own complications. It’s not a flat simple background colour. It’s “busy”. It needs a lot of attention to zoom in and make sure that the edges are well selected. This was a struggle for most students, but that’s ok. It’s a struggle for adults to do it properly.

Next week the students will come up with their own composite ideas, take the photos, and blend image on top of image.